43 STEPS
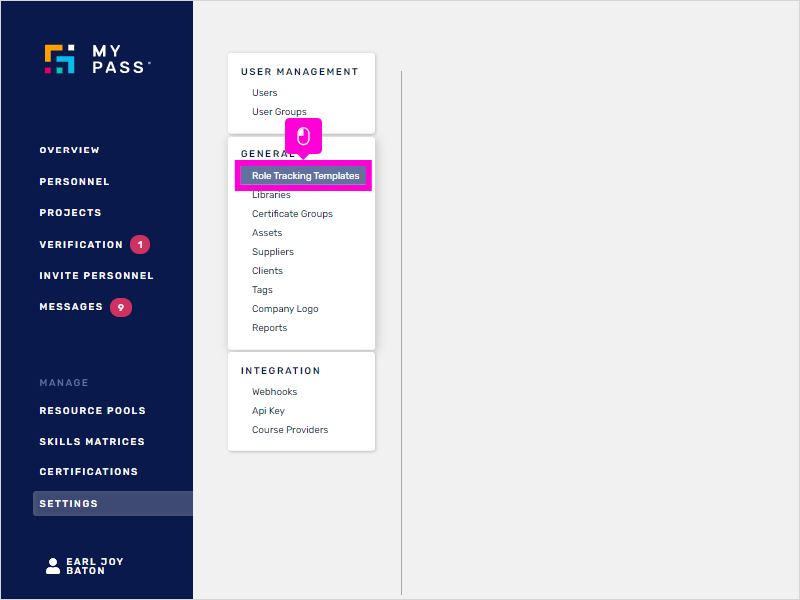
1. From your MyPass portal page, go to Settings.
2. Click on Role Tracking Templates.
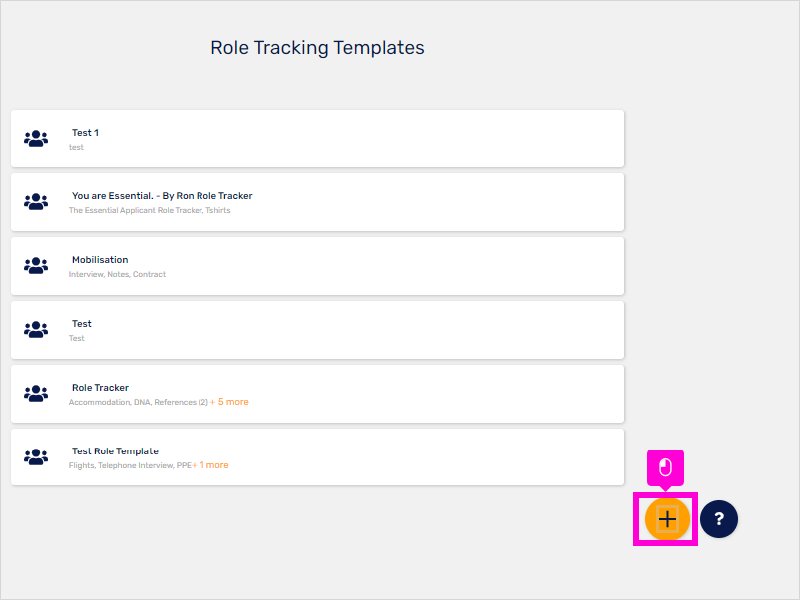
3. Click the '+' button found at the bottom right corner of the page.
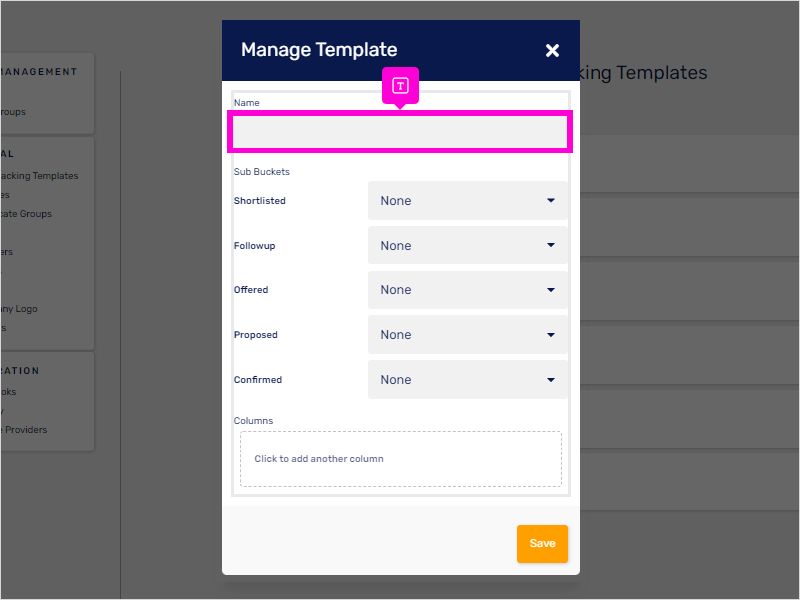
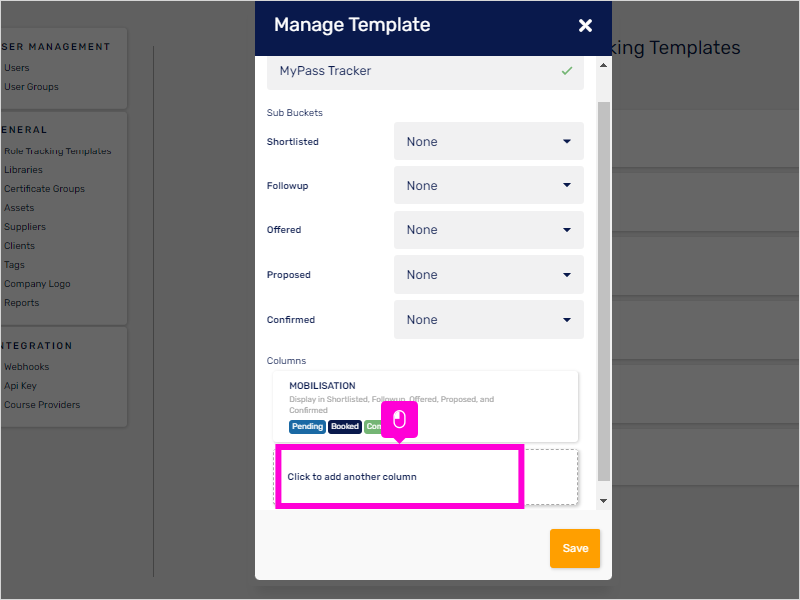
4. In the Manage Template window, input the name of the template.
5. Click Click to add another column to add your custom columns.
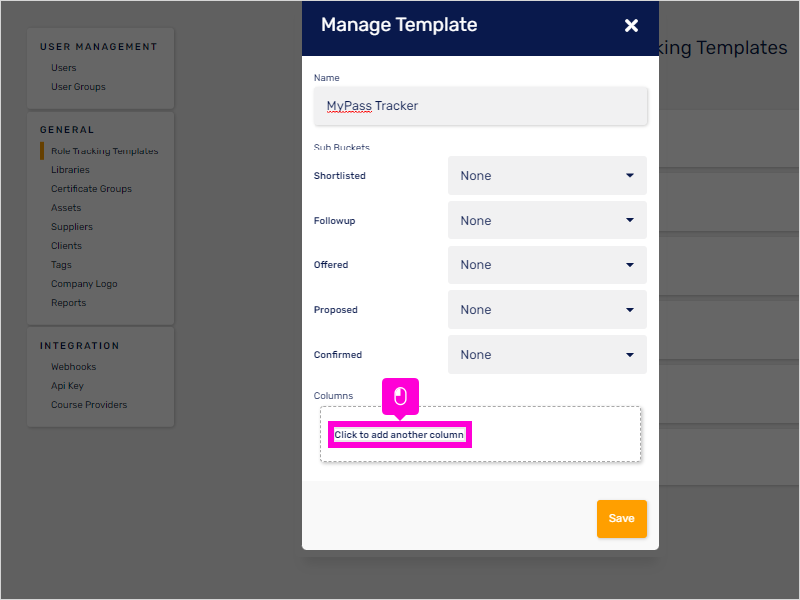
6. Customise your column according to where and how you would like it to appear.
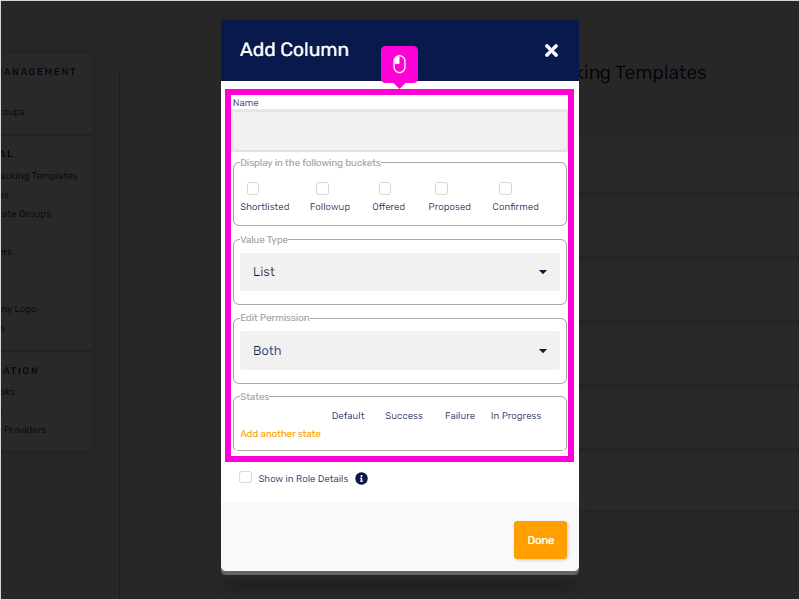
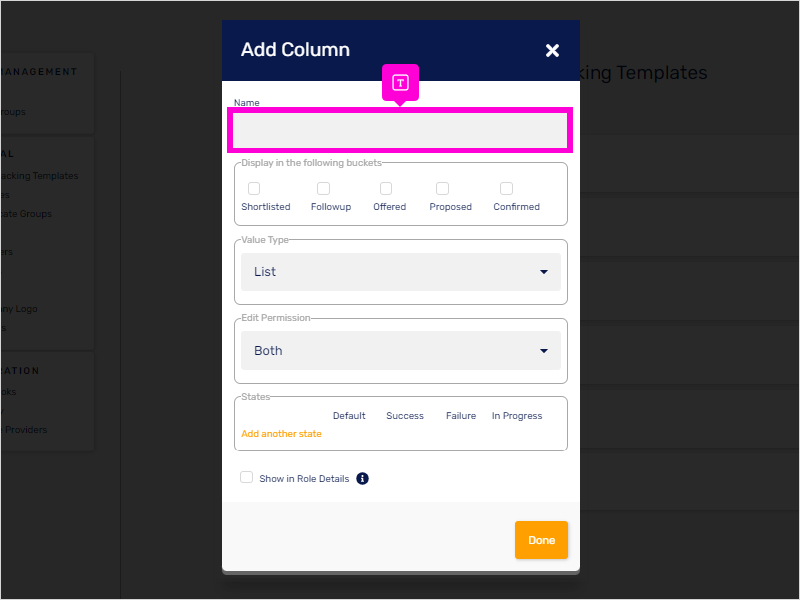
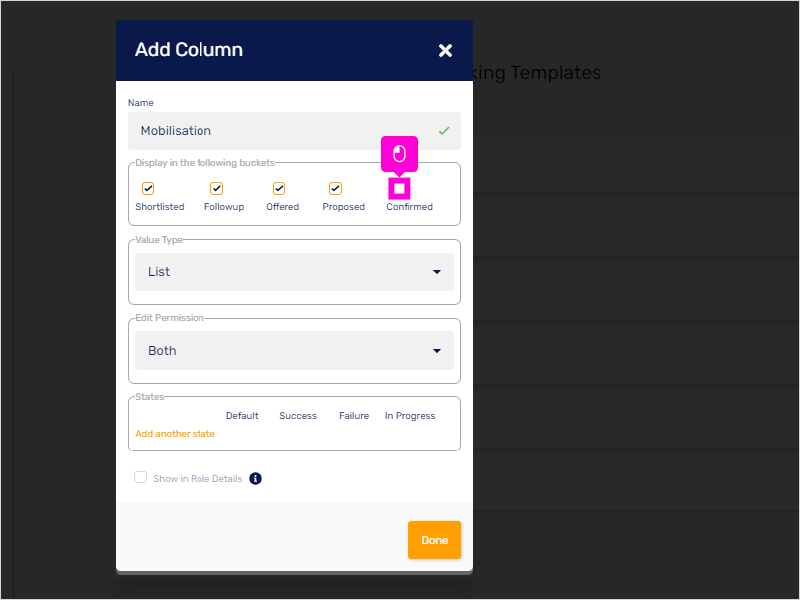
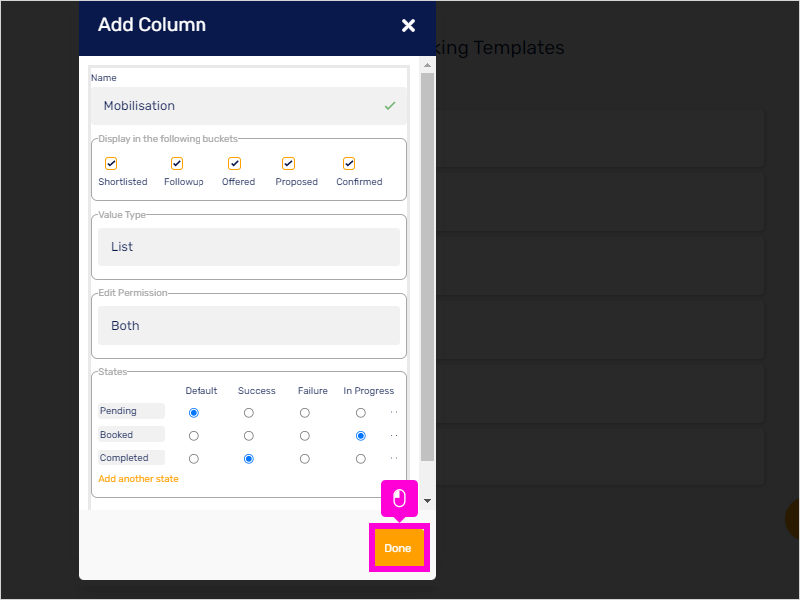
7. Input the name of the column.
8. Tick the bucket/s where you want the column to appear.
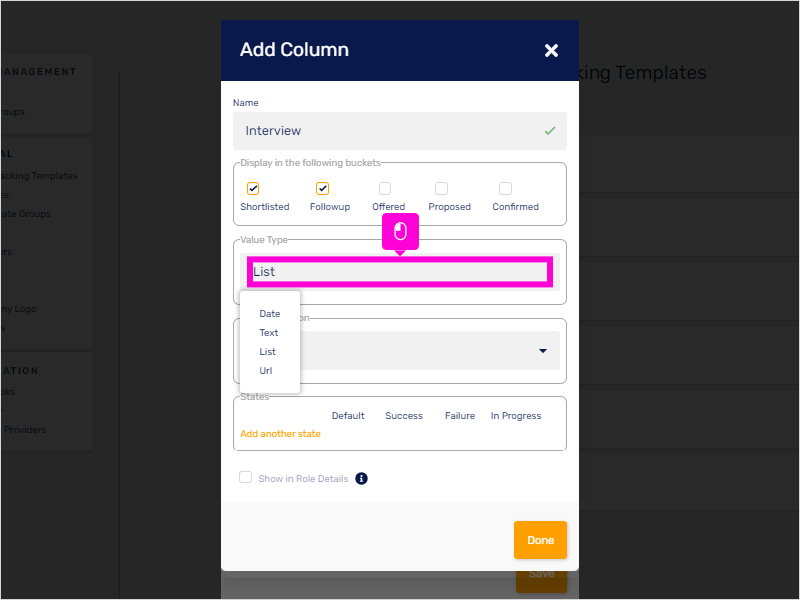
9. Click the drop-down menu for the Value Type.
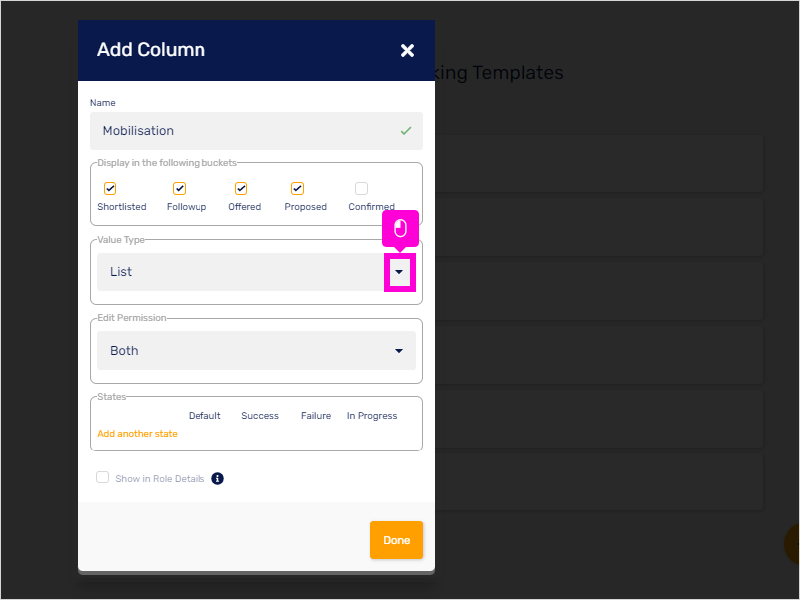
10. Select the Value Type (date/ text/ list/ url)

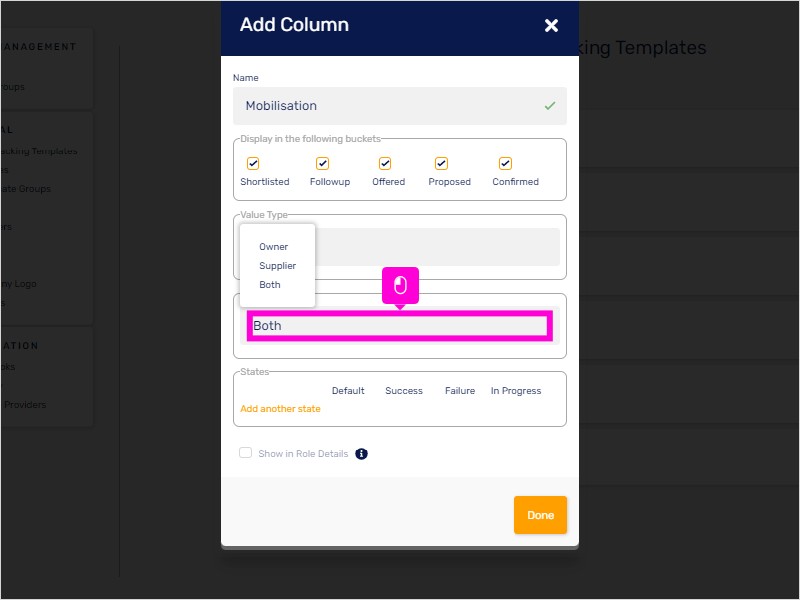
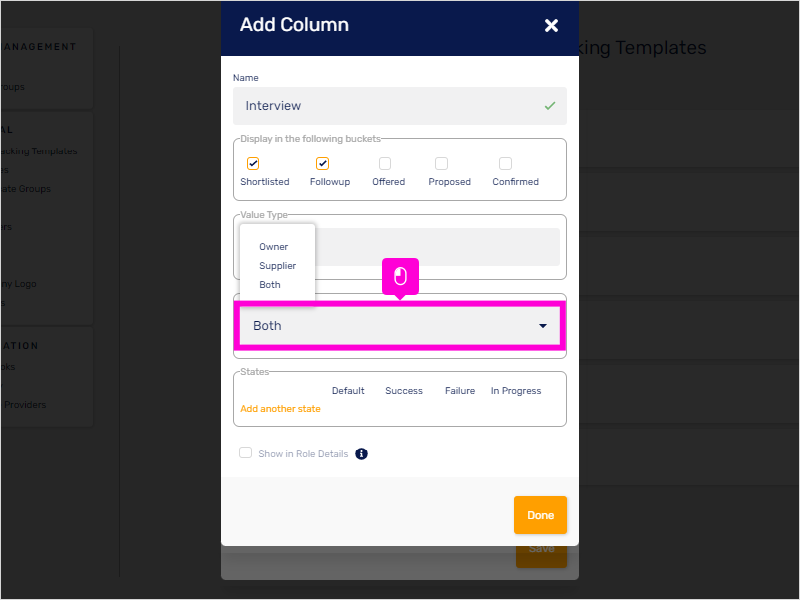
11. Click the drop-down for Permission.
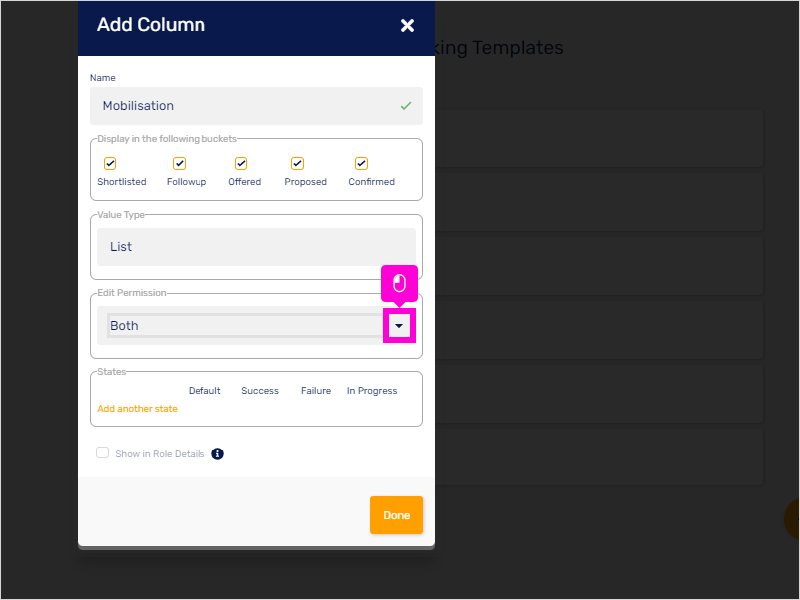
12. Select which users can edit in the Edit Permission field (owner/ supplier/ both).
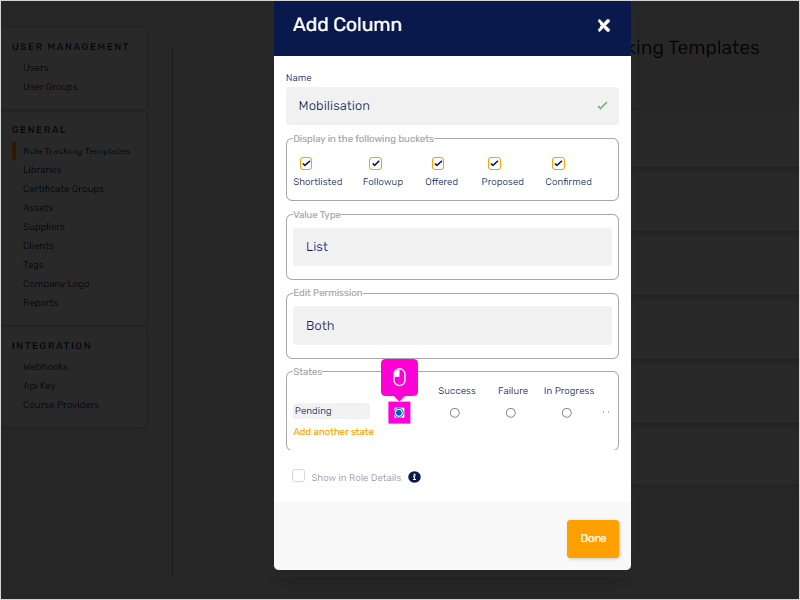
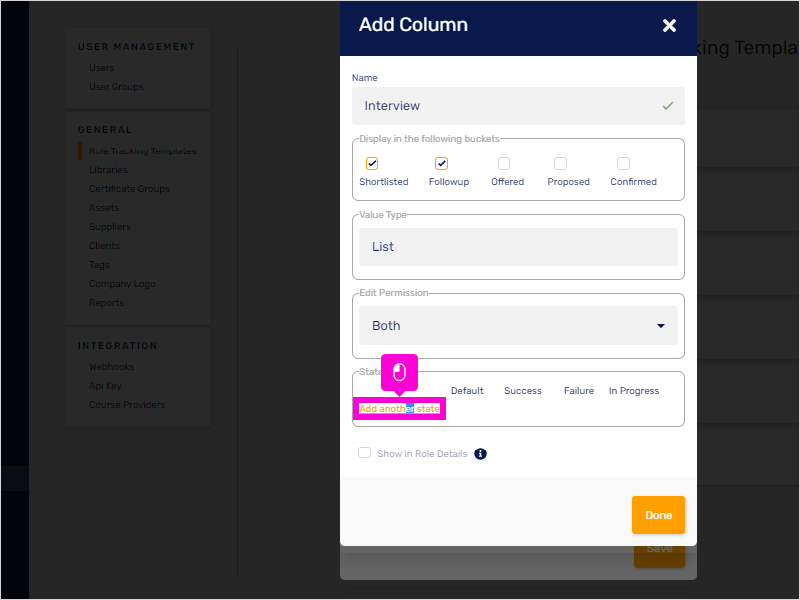
13. Click 'Add another state' and input its name. Each state can be treated as a success/failure/in progress or a default value.
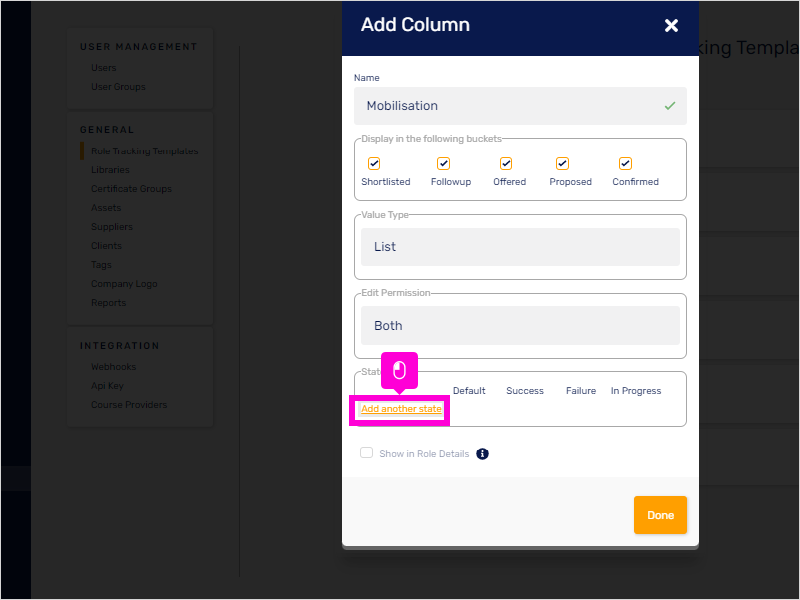
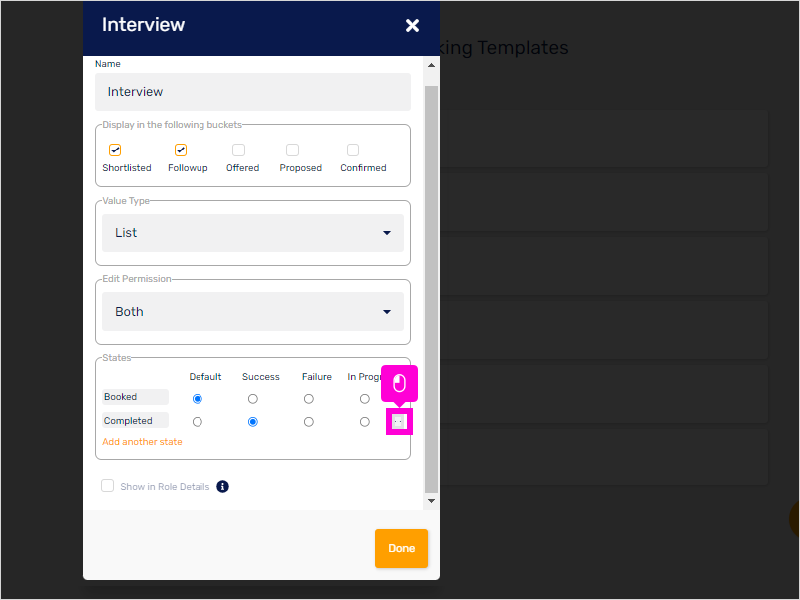
14. In the example, we created a 'Pending' state, and set its value to Default.
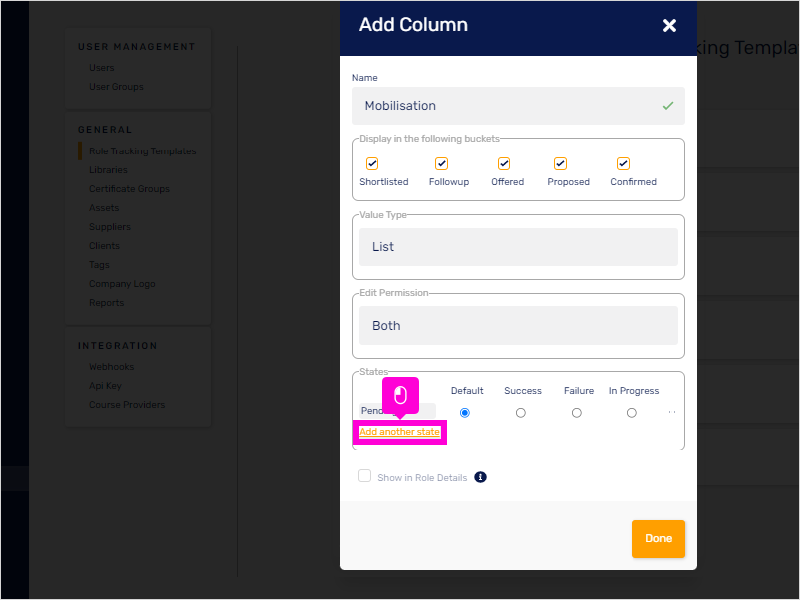
15. Click Add another state.
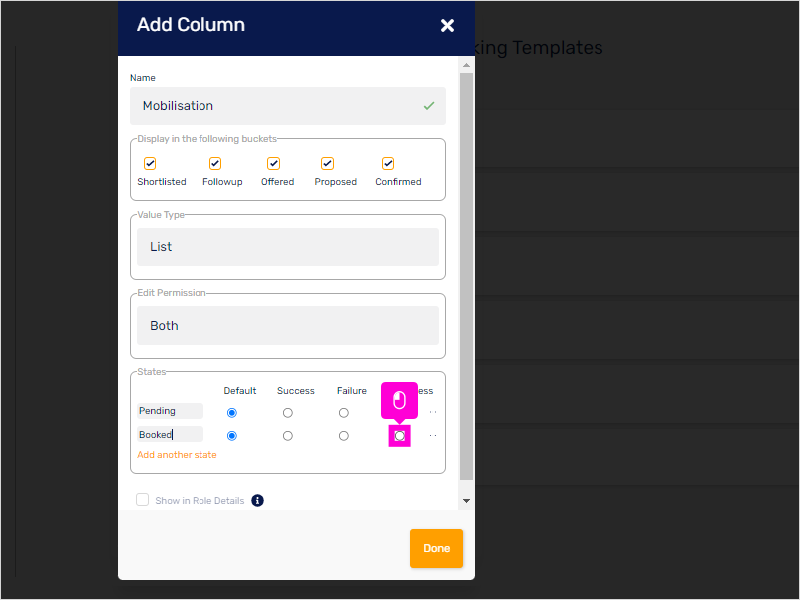
16. We've created Booked and set its value to Progress.
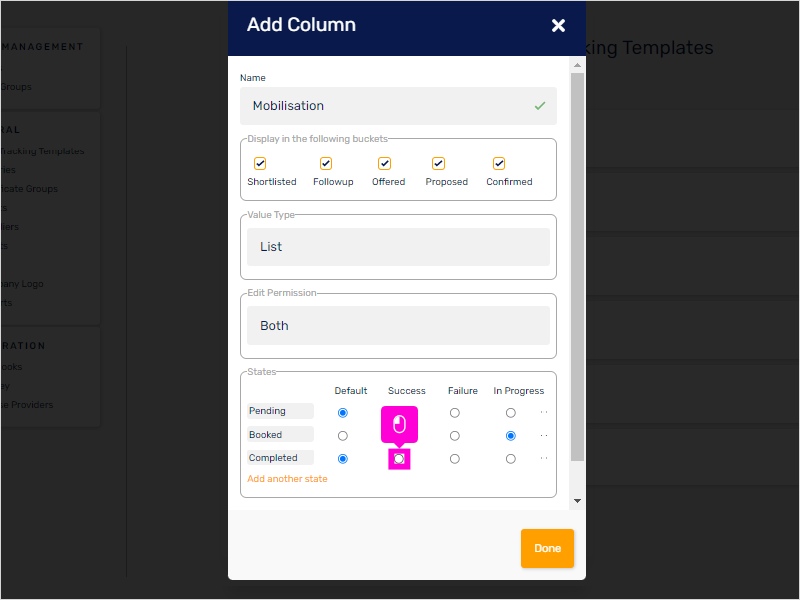
17. Add another state again by clicking the tab.

18. Input state as 'Completed'.

19. Click Success to set Value.
20. Click Done to add the Column.
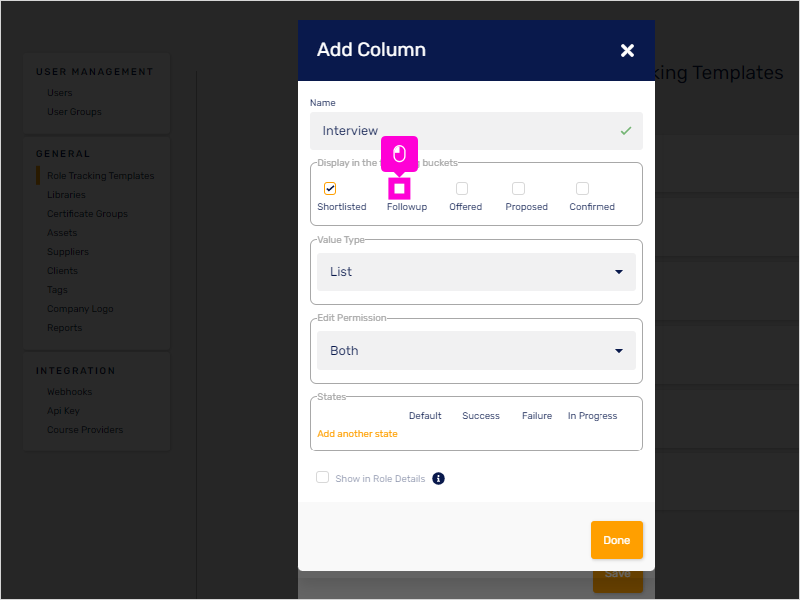
21. Click Click to add another column.
22. Type in the Column Name.
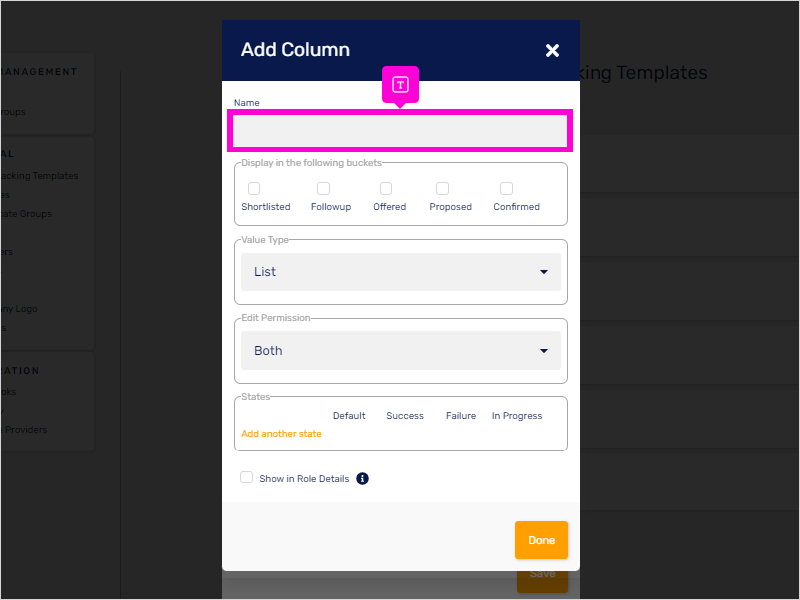
23. Then, tick the boxes where you'd like the column displayed.
24. Select the Value Type (date/ text/ list/ url).
25. Select User Permission by clicking on (owner/ supplier/ both).
26. Click Add another state. Kindly follow the steps indicated in Step 13 to19.
27. Type in the State.

28. Don't forget to set the Value. (Default, Success). And click Done to Save.

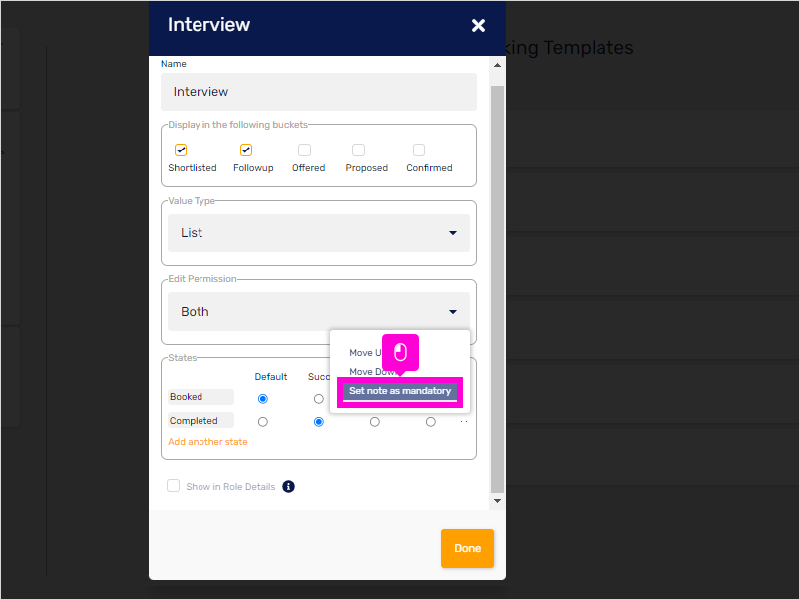
29. You can opt to have a specific state to set note as mandatory. Just click on the 3 dots[...] rightmost on the name of the state.
30. And select "Set note as mandatory".
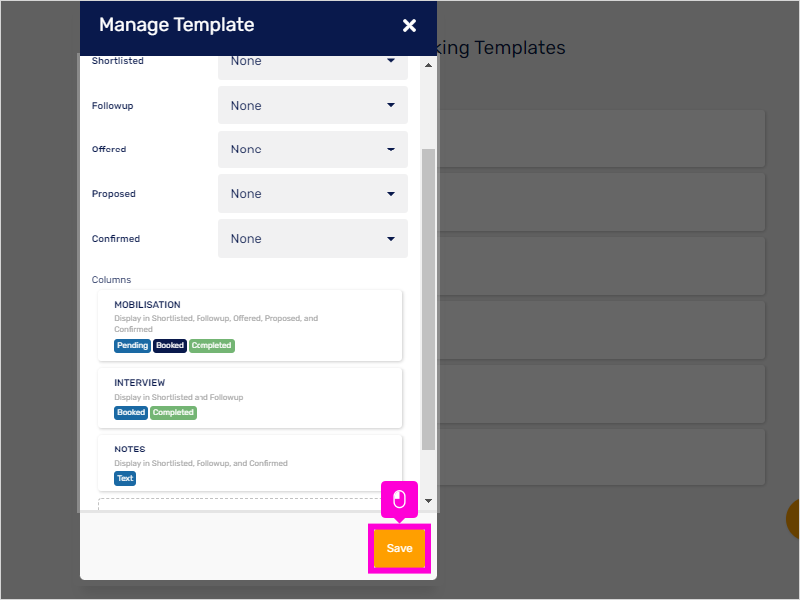
31. Lastly, Click Save to Save Template.
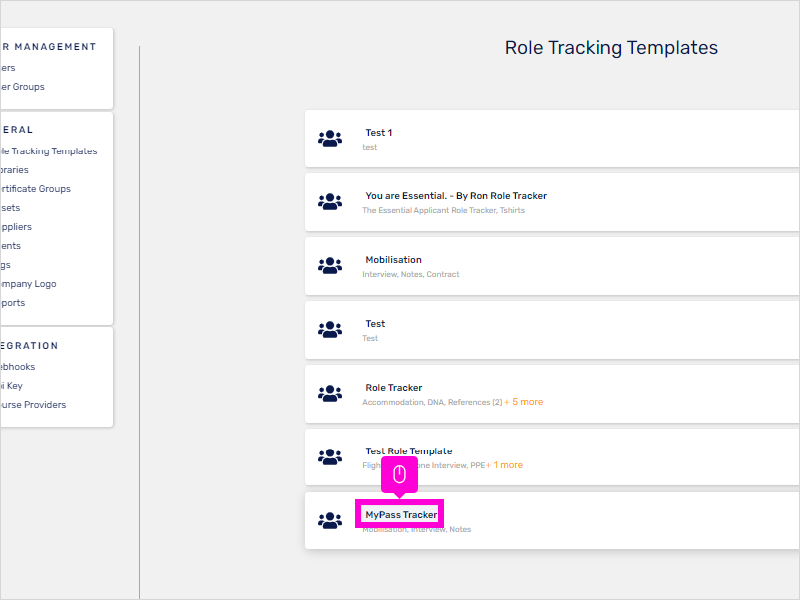
32. MyPass Tracker is now added.
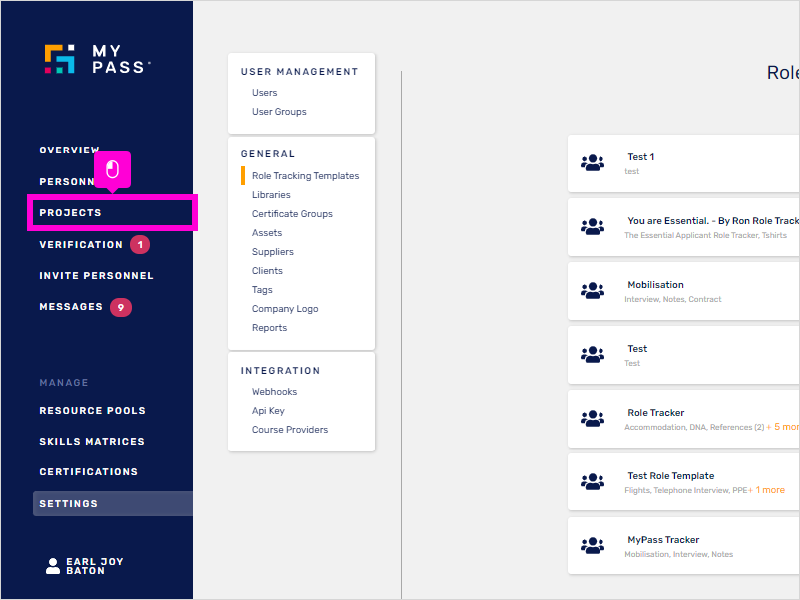
33. To add a Role Tracking Template into your existing Project:
Go to Projects in the sidebar.
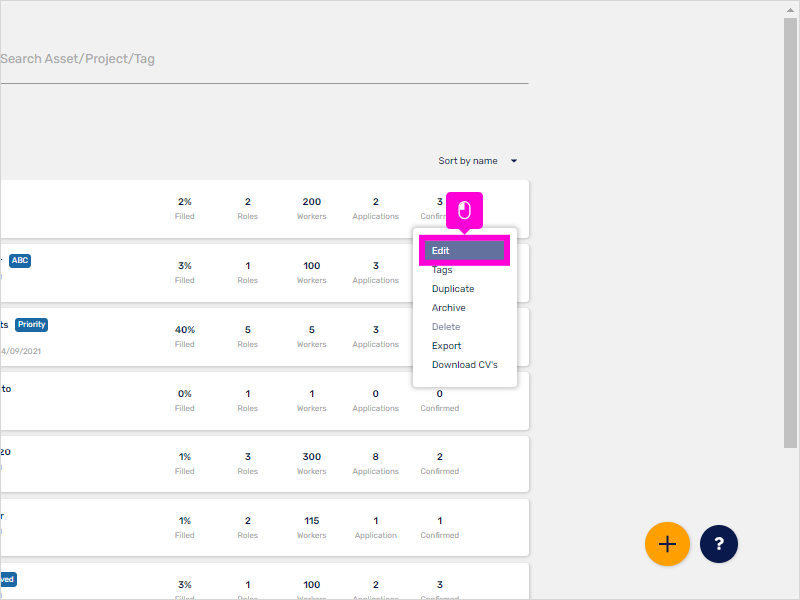
34. Hover to the project where you would like to add your created Role Tracking Template. Click on the more options icon.

35. And click Edit.
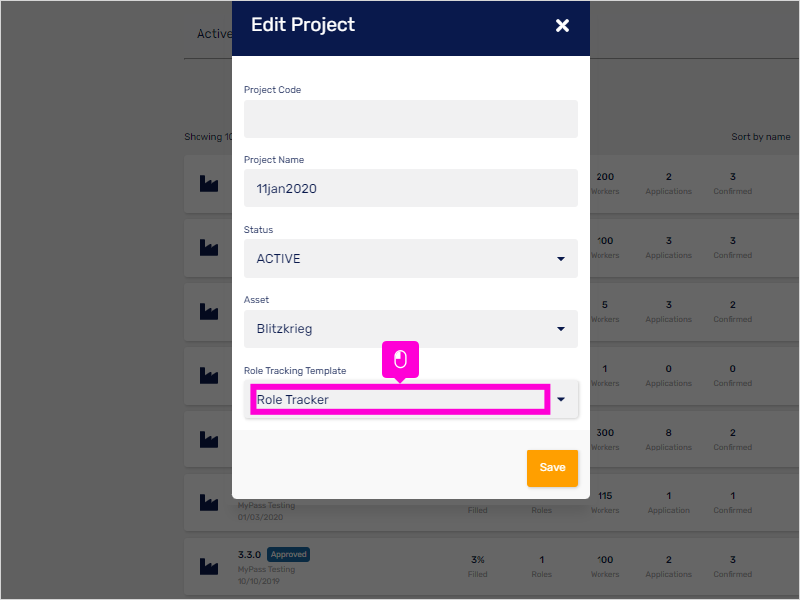
36. In the Edit Project window, click the 'Role Tracking Template' field and select the template that you've created.
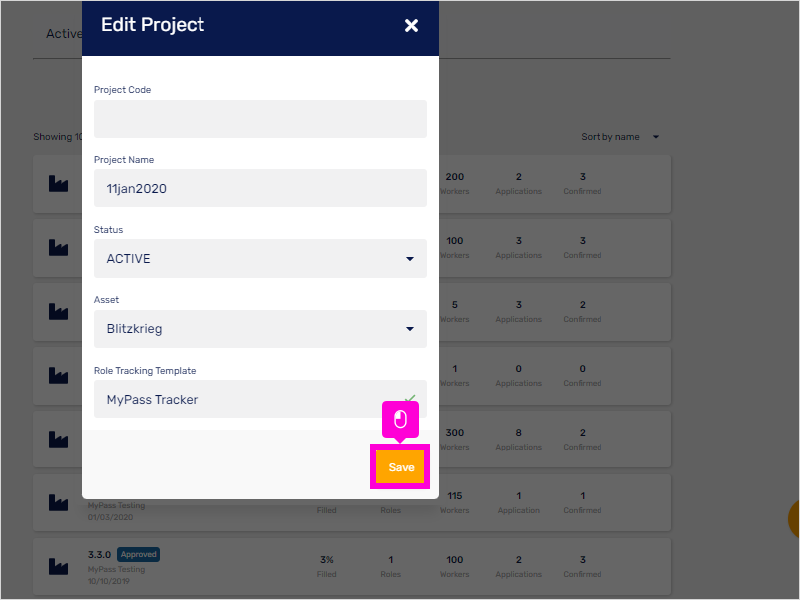
37. Then, click Save.
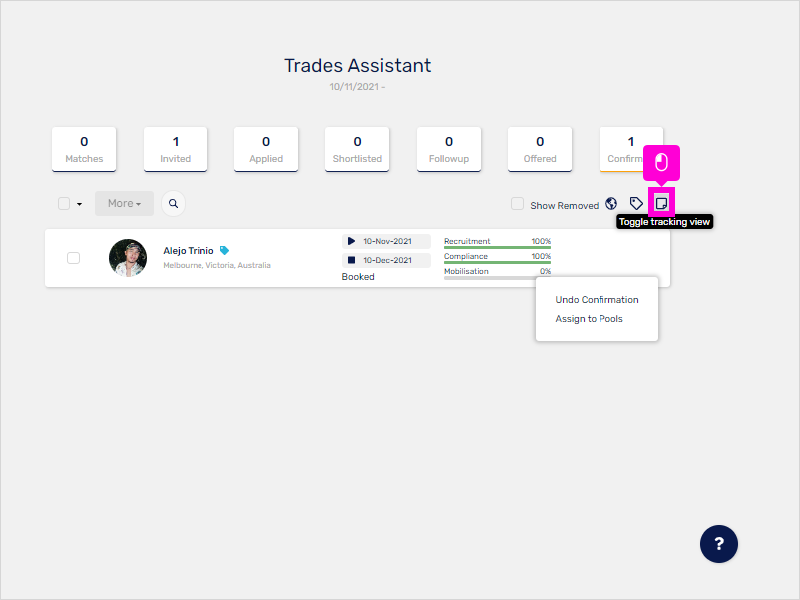
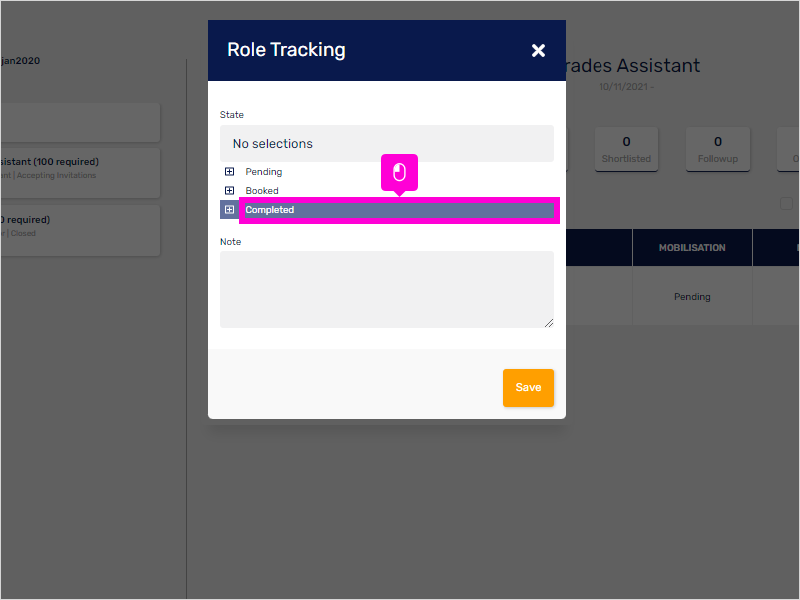
38. You can then toggle tracking view by clicking on the icon on each stage of the pipeline where you've set your buckets to appear.
39. Click on each pending status to update state.

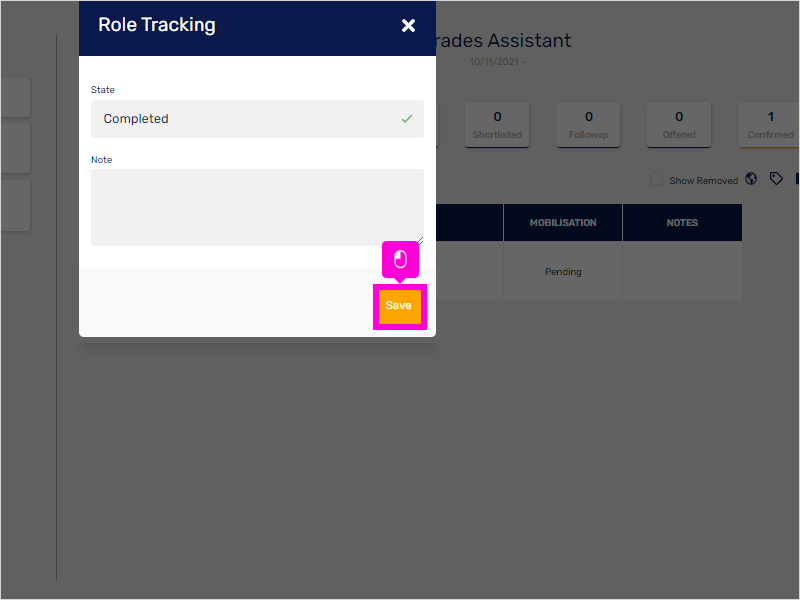
40. In the Role Tracking window, click the 'State' section and select the necessary action.
41. Then, click Save.
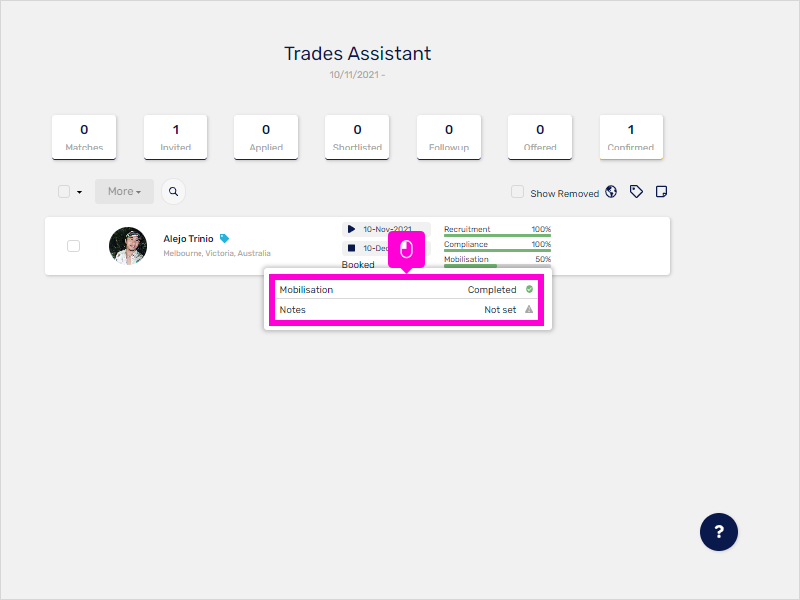
42. You can also check your mobilisation status in the Confirmed bucket. Click on the 'Mobilisation' progress bar to check the status.
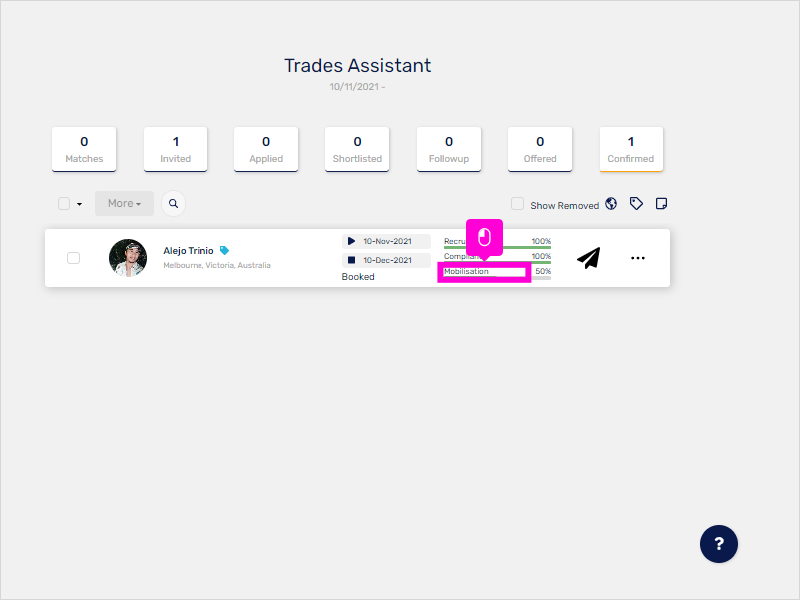
43. That's it! It's Completed.
Here's an interactive tutorial
https://www.iorad.com/player/1856865/Create-Role-Tracking-Templates