As a Service Provider, you are likely to have a list of personnel that you’d like to include in your Resource Pool. MyPass Invitations help you send bulk invites to personnel and lets you track the status of those invitations.
Here's an interactive tutorial
** Best experienced in Full Screen (click the icon in the top right corner before you begin) **
28 STEPS
1. Navigate to Invite Personnel on the left hand panel.
2. TIP: Before sending the invite, Notify your team and workers that you will be using MyPass and the workers are to expect an email inviting them to MyPass. We've drafted an email to help you do this here.
3. If an invitation batch already exists you can proceed to inviting the personnel by clicking on one of the existing invites, as seen in the highlighted.
4. If a batch does not exist you can create a new batch.
TIP: Before you start, ensure that you have created the resource pool to which you want to allocate the personnel.
How to create a Resource Pool
5. To create a new batch navigate to the highlighted plus sign at the bottom right hand corner of the page.
6. The next prompt will show, where you can allocate at your choice, the Name of the invite.
7. Once allocating the name, navigate to selecting the Resource pool where the personnel will be allocated.
8. Once both the name and Resource Pool is allocated, click Save.
9. Once saving you will be brought to this page where you will be inviting the personnel. There are two options to choose from:
Add personnel - This will add one user at a time.
Or
Upload personnel - to upload using the upload template provided.
10. If you are adding one user at a time navigate to the add tool.
11. Enter personnel's personal email address & Date of Birth.
MyPass checks email addresses to see if personnel already have a MyPass Worker Digital Passport. If they do, the personnel is invited to join your Pool using the existing MyPass profile.
12. Once the Email and Date of Birth is entered click Next.
13. If the personnel is not signed up to MyPass already you will be prompted to fill out more details.
First, enter Full First Name and Middle if applicable.
Note: No shortened nicknames
14. Secondly, fill out the Last Name.
15. Lastly, you can then enter the Preferred Name if the personnel goes by another name.
Note: Do not add any preferred names into First Name.
16. Once all required names are filled out, click Next.
17. You will then be brought back to the invite batch where the personnel has been Uploaded for an invite.
Note: This has not yet sent the invite.
18. To invite the personnel select all by clicking in the highlighted box.
Note: Selecting this box will invite ALL personnel on this page.
19. Once all personnel are selected, click Invite.
20. The following prompt will appear where you can include any desired messaging. Once done click Invite.
21. Now you have completed the Invitation and the number of invites will show in the Invited box.
22. To bulk upload personnel using the template navigate to and click Upload.
23. The next prompt will show the Download template.
1. Open the invitation template that you have downloaded.
2. Enter the details in the columns.
The details include: Email and Date of Birth.
3. Save the template
24. Once completed upload the template to MyPass. The MyPass system will check email addresses to see if personnel already have a MyPass Digital Passport. If they do, the personnel is invited to join your Pool using the existing MyPass profile.
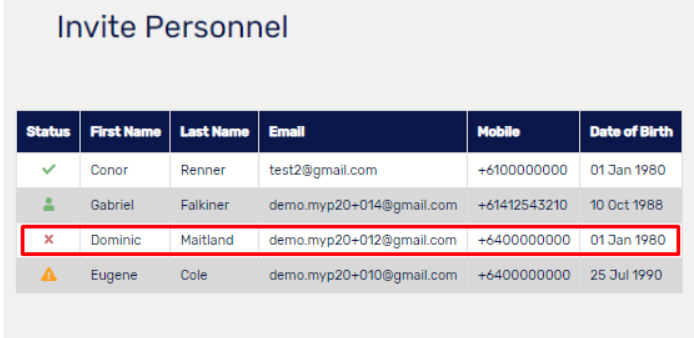
25. If the email address matches to the one that's existing in the system but there are discrepancies to the first names or last names, you will then get a warning icon although it will automatically correct the details.
26. Note: if you get the X icon which means DOB doesn't match, you will then need to correct it as you won't be able to add it successfully unless corrected.
27. Once ready and there are no discrepancies click invite.
28. Now the personnel have been invited you can see the status of those in the highlighted boxes.
That's it. You've now invited the personnel to your resource pool.
Upload Status defined:
 - the personnel is new to MyPass
 - personnel already exists, note that discrepancy in the Mobile # will override the one in the existing profile
 - personnel exists but Date of birth does not match
 - personnel exists but the name did not match exactly
Click anywhere if the personnel details that have been uploaded have errors to correct the information. Once corrected, click Save.
The number of personnel to whom invitations are sent is shown in the Invited tab and in the Accepted those that have accepted the invitation.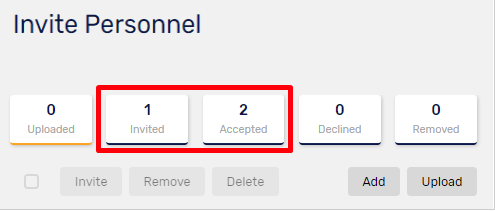

TIP: Before sending the invite Notify your team and workers that you will be using MyPass and the workers are to expect an email inviting them to MyPass. We've drafted an email to help you do this here.
Always use the worker's personal email addresses to set up accounts to avoid duplication.